Node.js Security Unleashed: Your Ultimate Defense Guide (4/7)
Part 4 - How to prevent Denial of Service (DoS/DDoS)

Devoted Web Solutions Architect, Software Engineer and Technical Writer from Kharkiv, Ukraine. Areas of focus: Front and Back End development, DevSecOps, Computer Networking and Security, Dev.
A Preface
Nowadays, everyone acknowledges that there exists a plethora of possible attacks and exploits, each capable of employing diverse approaches to compromise a targeted system. Thankfully, a significant portion of them derives from the well-established concepts and relies on widely recognized patterns.
Therefore, such threats, though each having its own peculiar characteristics, can still be classified based on their shared traits. By identifying these commonalities, the development community managed to elaborate a comprehensive suite of effective countermeasures against them.
Throughout this article series, we will highlight seven signature attack patterns that we should be concerned about when safeguarding our Node.js applications.
!!! Disclaimer !!!
The information provided in this article is intended for educational purposes only. Readers are encouraged to consult with qualified cybersecurity experts and adhere to their organization’s security procedures when addressing the mentioned attacks. Neither the author nor the hosting platform is responsible for any actions taken by individuals or organizations based on the information contained herein.
Please be prudent, and use the provided information solely with good intentions.
Series Agenda:
4/7: ⠀Denial of Service (DoS/DDoS) — you are here.
5/7: ⠀SQL Injections (SQLi).
6/7: ⠀NoSQL Injections.
7/7: ⠀OS Command Injections.
How to prevent Denial of Service (DoS/DDoS) in Node.js
Introduction
Greetings, dear readers!
Welcome to the fourth installment of our article series dedicated to the theory and practice of defending against prevalent attack patterns in software development.
In this very segment, we aim to focus on one of the most impactful and widespread threats, the Denial of Service (DoS), and come to know why we as developers should be concerned about it.
By the end of this paper, you will be well-equipped with both the general knowledge about DoS & DDoS attacks and the skills needed to diminish their impact on your applications.
So without further ado, let’s begin our journey…
Understanding DDoS
The Denial of Service (DoS) is an attack focused on making a resource (site, application or server) unavailable for the purpose it was designed. ... If a service receives a huge amount of consecutive requests, it may cease to be available to the legitimate users. On the other hand, a service may stop if a programming vulnerability is exploited, or the physical resources it uses are exhausted.
Excerpted from: https://owasp.org/www-community/attacks/Denial_of_Service
In other words, the infamous Denial of Service (DoS) attack is primarily aimed at sabotaging a system’s operability or uncontrollably increasing its maintenance costs. Such effect is achieved by subjecting a system to a specific set of conditions, under which its ability to provide the intended functionality is either significantly hindered (e.g. limited to a selected row of consumers) or completely disrupted.
Among other repercussions, such attacks introduce largely delayed responses, excessive network packet losses and temporary service interruptions - thus negatively influencing the service's availability.
Given the obvious danger imposed by DoS, many related software vulnerabilities have already been addressed or made much more challenging to exploit.
However, despite the infrequent occurrence of conventional DoS in the present day, their fundamental threat has not been entirely diminished.
Distributed DoS
With today's largely improved DoS protection mechanisms, the successful execution of a DoS attack using only a single host is practically impossible. But where one machine couldn't succeed, multiple surely can.

This potency incarnates in the Distributed Denial of Service (DDoS) which represents a more powerful variant of the DoS attack, amplifying the associated threats tenfold.
Unlike traditional Denial of Service, the distributed DoS involves a coordinated effort of multiple actors or entities (thus the title of distributed) focused on full (or partial) exhaustion of the system’s hardware resources.
Simply put, an attacker side tries to overwhelm a certain software service with a multitude of simultaneously active consumer connections. Each of them periodically emits a fixed volume of network traffic, preventing a server from shifting attention to other requests.
Besides directly harming the software's frontline, DDoS attacks are commonly employed with other malicious intents. Rather than affecting an item that lies on the surface (the application itself), attackers often infringe the integrity of its internal infrastructure. Particularly, this covers the services it depends upon (incl. data sources, payment gateways etc.) as well as third-party integrations it communicates with.
The cascading nature of this attack pattern can disrupt an ecosystem as a whole, affecting a large number of interconnected systems and services. Eventually, this impact would cause a targeted enterprise substantial financial and reputational damage.
Such relentless onsets under the DDoS aegis can conquer every, even the most robust, digital infrastructures, making them a sphere of grave concern for organizations of all sizes.
Post Scriptum
Since large-scale DDoS attacks are rather costly activities, in most scenarios they are conducted illegally through a Botnet (e.g. a network of malware-infected devices). By demand, it forces all compromised hosts (bots) to unknowingly flood the victim application with network traffic, causing an uncontrolled spike of resource consumption and quickly overwhelming it.
Such DDoS attacks are usually short-lived and last for a relatively brief period. The attacker launches a quick burst of traffic and stops afterward, hoping to cause service disruption and downtime during that specific time frame.

In theory, however, nothing stops the attacker side from achieving the same effect in a more "legitimate" way (e.g. leasing a fleet of cheap VMs). This approach, though more expensive, may be utilized for more sophisticated attack patterns (like Reflective DDoS), raising the already high stakes in a game of security.
Real World Example
As our guide is primarily focused on guiding developers, the further narration will be pivoted from the Network Layer to the Application Layer.
At it, most DoS attacks are trying to identify and exploit any misconfigured actions that can increase the rate of resource utilization (incl. by CPU, RAM, Disk Space or Network Bandwidth).
Among other cases, these may include manually repeating activities (like retrying a network call), basic foreach loops (like iterating over a large collection), Input/Output operations (like data streams or image buffer processing) or complex regular expression matches.
— — — — — — — — — — —
The Example Situation
For instance, imagine a fresh Business Intelligence (BI) product that allows its consumers to create complex sales reports out of the provided financial data.
Under the hood, this functionality is implemented using Node.js Streams API which is considered a good practice when processing large amounts of alike datasets.
However, the service's API does not enforce any size limit on the incoming request payload nor times out an operation after some fixed period passes on.
This essentially means that any user can submit an arbitrary-sized data input and indefinitely exhaust the system's hardware resources (CPU and Disk I/O).
Having identified such vulnerability, a rivaling enterprise decides to take action. It deploys a fleet of cheap virtual servers and configures them to continuously hit this single point, staggering the targeted system from processing legitimate requests.
Before being fixed, this DDoS attack can cause a remarkable financial and reputational impact, eventually forcing a victim company to go bankrupt.
Here is a sketchy example of the vulnerable Node.js server:
/* report-streams.ts */

import { Transform } from 'node:stream';

interface ISalesData {
  id: number;
  name: string;
  sales: Array<number>;
}

interface IReportData {
  id: number;
  name: string;
  totalSales: number;
  averageSales: number;
}

export class ReportTransformStream extends Transform {
  constructor() {
    // `objectMode: true` is necessary here.
    // Without it, we can't read the `salesData` as JSON object and not Buffer
    super({ objectMode: true });
  }

  _transform(salesData: ISalesData[], _: string, callback: Function): void {
    const reportData = salesData.map<IReportData>((rawData) => {
      const { id, name, sales = [] } = rawData;

      // Transform input data into report format
      const totalSales = sales.reduce((acc, curr) => acc + curr, 0);
      const averageSales = totalSales / sales.length;
      // ...other report data

      return {
        id,
        name,
        totalSales,
        averageSales,
      };
    });

    callback(null, JSON.stringify(reportData));
  }
}

export class ParseJsonStream extends Transform {
  constructor() {
    // `objectMode: true` is necessary here.
    // It allows to pass the parsed JSON object further down the pipeline
    super({ objectMode: true });
  }

  _transform(chunk: Buffer, _: string, callback: Function): void {
    try {
      const reqChunk = chunk.toString();
      const parsed: { sales: ISalesData[] } = JSON.parse(reqChunk);

      callback(null, parsed.sales);
    } catch (error) {
      callback(error);
    }
  }
}
— — — — — — — — — — —
/* application.ts */

import { pipeline } from 'node:stream/promises';
import { ParseJsonStream, ReportTransformStream } from './report-streams';
import Express from 'express';

const app = Express();

app.post('/generate-report', async (request, response) => {
  try {
    // We will respond with a chunked JSON back to the client
    response.setHeader('Content-Type', 'application/json');
    response.useChunkedEncodingByDefault = true;

    await pipeline(
      // Reading the data from the `application/json` request body
      request,
      // Parsing the incoming data Buffers into plain JSON objects
      new ParseJsonStream,
      // Creating a sales report based on the received JSON payload
      new ReportTransformStream,
      // Sending a JSON report back to the client in a response
      response,
      { end: true },
    );
  } catch (error) {
    console.log(error);
    response.sendStatus(500);
  }
});

app.listen(8080, '127.0.0.1');
— — — — — — — — — — —
Avoiding the Stated Threats
To mitigate the negative scenario described above, we could implement two important mechanisms in our code:
1. Enforcing Request Limits.
- We should block the incoming request if its payload is too large.
NB: This is a typical use case for the 413 Payload Too Large HTTP status code.
2. Enforcing Operation Timeout.
- We should forcefully terminate the report generation if it hasn't been completed after some fixed amount of time.
...

// We could enforce the payload limit here --->
app.use(Express.json({ limit: '3mb' }));

const MB_IN_BYTES = 1024 ** 2;

app.post('/generate-report', async (request, response) => {
  try {
    /* --- NEW --- */
    const contentLength = parseInt(request.headers['content-length']!, 10);
    const MAX_PAYLOAD_SIZE = 3 * MB_IN_BYTES;

    // ---> Or here, relying on the `Content-Length` header
    if (contentLength >= MAX_PAYLOAD_SIZE) {
      return response.sendStatus(413);
    }
    /* --- NEW --- */

    ...

    await pipeline(
      ...
      {
        // Aborting the operation after 5 seconds will pass
        signal: AbortSignal.timeout(5000),
        end: true,
      },
    );
  } catch (error) {
    ...
  }
});
(D)DoS Classification
The regular DoS, as we indicated in the previous section, mainly targets any resource-intensive actions that haven't implemented proper defensive measures, or routes that are known to handle high-traffic demands.
The DDoS, however, opens a much broader array of possible attack vectors.
— — — — — — — — — — —
Before we Begin...
Most of the DDoS classifications you may find on the Internet are designated for network administrators/engineers and appear highly technical.
All because it is indeed very hard to categorize the widest variety of such attack patterns, and comprise it into an audience-agnostic material.
In the current section of our Guide, we will only scratch the surface, briefly outlining the general groupings, their primary attack targets and often encountered examples.
— — — — — — — — — — —
In general, common DDoS threats may be split into three vast categories, based on the following criteria: the level they operate on, their mechanism, and their target.
1. Levels of DDoS attacks (OSI model boundaries).

a. Application Layer (OSI Layer 7).
Description: Attacks at the Application Layer focus on overwhelming specific services or functionalities within a public-facing application. They often exploit vulnerabilities in the application codebase or configuration manifests, leading to the service degradation or unavailability.
Common Targets: Web servers, public APIs, sensitive Application logic and AuthN/AuthZ mechanisms.
Attack Example(s): HTTP Flood, which overloads the server with a huge number of HTTP requests, simulating legitimate user requests and causing traffic clogging.
b. Presentation Layer (OSI Layer 6).
Description: Attacks at the Presentation Layer often exploit vulnerabilities in the SSL/TLS cryptographic protocols, or target their encryption & decryption processes. This attack type can rapidly deplete the server's CPU resources, making it unable to maintain secure communication channels for incoming sockets.
Common Targets: SSL/TLS operations and SSL termination points.
Attack Example(s): SSL Renegotiation vulnerability exploit that aims to compel previously established SSL sessions. It forces them to undergo "renegotiations" of the pre-agreed SSL contracts - essentially, recreating the encrypted connection with the altered parameters.
Although the server can still be operational during this attack, it becomes unable to establish any new secure contexts, leading to a partial Denial of Service.
c. Transport Layer (OSI Layer 4).
Description: Attacks at the Transport Layer aim to exploit weaknesses in the network protocols, such as TCP or UDP. By targeting raw communication channels, attackers can disrupt connections between the clients and a server.
Target(s): TCP & UDP connections, high-level network infrastructure.

- Attack Example(s): SYN flood attacks, focused on overwhelming the target server with a large number of incomplete TCP handshakes (hanging SYN requests not followed by a client's ACK), exhausting its resources and preventing the establishment of legitimate connections.
d. Network Layer (OSI Layer 3).
Description: Attacks at the Network Layer try to overload the network infrastructure, that is, through high-volume traffic or exploits in routing protocols. Such threats can lead to a complete connectivity loss for the targeted server.
Target(s): Routers, switches, NATs, logical network links (IP/MAC addresses).
Attack Example(s): Ping (ICMP) Flood attacks, confusing the server with many ICMP packets, consuming network bandwidth and causing network congestion.
2. Mechanisms of DDoS attacks

a. Volumetric Attacks.
Description: Volume-based attacks flood the target with a massive amount of traffic, overwhelming its capacity to handle requests. Their primary aim is to saturate the available server's bandwidth and exhaust its computing resources.
Target(s): Bandwidth, network infrastructure, hardware resources.
Attack Example(s): Reflective Amplification attacks, utilizing vulnerable servers as intermediary traffic amplifiers, which then redirect it towards the target, causing network congestion.
b. Protocol Attacks.
Description: Protocol-based attacks exploit vulnerabilities in communication protocols, leading to service disruptions. Attackers manipulate protocol weaknesses to exhaust server resources or cause communication failures.
Target(s): Specific protocols (e.g., TCP, UDP, ICMP).
Attack Example(s): Fragmented Packet attack, where attackers exploit vulnerabilities in the protocol by sending fragmented packets to overwhelm the server and disrupt communication. This involves breaking down data into smaller fragments, making it challenging for the server to reassemble and process the information efficiently.
c. Resource Depletion Attacks.
Description: Resource depletion attacks focus on exhausting crucial hardware resources required for the correct system's operability. These include CPU, memory or other critical components.
Target(s): CPU, RAM, disk space, database connections.
Attack Example(s): Low and Slow attacks, exploiting the limitations in the number of concurrent connections a server can handle, tying up available connections and preventing new ones.
NB: We will touch upon this specific attack pattern in the next section.
3. Targets of DDoS attacks
a. HTTP(S) Attacks
Description: HTTP(S) attacks specifically target web servers and applications, exploiting vulnerabilities in the HTTP(S) protocols or overwhelming servers with a large number of requests.
Target(s): Web servers, web applications, APIs.
Attack Example(s): HTTP GET/POST floods, overwhelming a server by sending a massive number of GET/POST requests, potentially causing service disruption.
b. DNS Attacks
Description: DNS attacks focus on overwhelming the DNS infrastructure, leading to service disruptions or preventing users from accessing the intended services.
Target(s): DNS servers and DNS resolution processes.
Attack Example(s): DNS Amplification attacks that exploit DNS servers to amplify and redirect traffic toward the target, causing domain resolution failures.
c. VoIP Attacks
Description: VoIP attacks aim to disrupt Voice over Internet Protocol (VoIP) services by exploiting vulnerabilities in the communication protocols or overwhelming the network infrastructure.
Target(s): VoIP servers, VoIP communication channels.
Attack Example(s): RTP (Real-Time Transport Protocol) flood attacks, overwhelming VoIP channels with an excessive amount of RTP traffic, causing call quality degradation or service unavailability.
And the list goes on...
Defense Mechanisms
Now, upon classifying the DoS/DDoS threats, let us explore how we can prevent such attacks from causing havoc within our software systems.
1. Rate Limiting Strategies
Let us remind you once more that, to successfully execute a DDoS attack, a bad actor should generate a significant volume of network requests. To achieve this, he would need to establish a high number of simultaneous (concurrent) socket connections.
Fortunately, in most cases, these connections can be easily distinguished from one another, based on such factors as IP address, geo-location or user-agent header. This transparency gives us, as defenders, a crucial advantage. With it, we can effectively monitor, track and regulate traffic on an individual basis.
This leads us to the Rate-Limiting strategies, which, as their name implies, aim to limit the rate at which a certain resource can be accessed by a single identifiable client.
With the Rate Limiting in situ, requests are initially processed normally, up until they hit a specific numeric threshold. Beyond this point, the processing of all subsequent requests is either staggered or promptly rejected, preventing their queuing up and eventually overloading the system.
A granular per-route Rate Limiting policy lets us confidently avoid resource shortages and request floods during distributed attacks.
There exist many battle-tested methods for implementing robust rate-limiting mechanisms. The most popular four of them include:
The Fixed Window algorithm.
Restricts the amount of per-socket requests within a predefined (fixed) time frame. The first request starts the timeout, while any subsequent ones count towards the declared limit quota.The Sliding (Rolling) Window algorithm.
Unlike the static Fixed Window approach, the Sliding Window maintains a record of request timestamps within a dynamic window timeframe. The request logs are queued up until a declared quota is hit, which then initiates the timeout.
As time progresses, requests older than the specified window duration are removed.The Token Bucket algorithm.
An application maintains a “bucket” for every client. Each incoming request deducts a single “token” (quota) from the corresponding bucket. When the bucket becomes empty, further requests are temporarily halted, and it gradually starts refilling at a predetermined rate.The "Leaky" Bucket algorithm.
An application maintains a “bucket” of points for every client. Each incoming request appends a single point to the corresponding bucket. When the bucket overflows, further requests are temporarily halted. Meanwhile, old requests are removed at a constant rate.
— — — — — — — — — — —
As with everything else in IT Industry, you may adopt the already existing implementations of Rate Limiting (like the Fixed Window provided by express-rate-limit package or Sliding Window by rolling-rate-limiter library), or choose to build your own.
To consolidate our understanding of this complex topic, let us choose the latter option and implement a simple Redis-backed Fixed Window algorithm from scratch:
import Redis from 'ioredis';
import express, { Request, Response, NextFunction, Handler } from 'express';

const redisClient = new Redis({
  host: '127.0.0.1',
  port: 6379,
  db: 0,
});

const TOO_MANY_REQUESTS = 429;

interface ILimiterOptions {
  keyNamespace: string;
  limitResHeader: string;
  refillRatePerSec: number;
  bucketCapacity: number;
  tokenCost: number;
  idleTimeout: number | false;
}

export function rateLimit(opts: Partial<ILimiterOptions> = {}): Handler {
  const {
    keyNamespace = 'api/rate-limit',
    limitResHeader = 'X-Retry-After',
    refillRatePerSec = 2,
    bucketCapacity = 100,
    tokenCost = 1,
    // delete the associated bucket after 3 hours of inactivity
    idleTimeout = 60 * 60 * 3,
  } = opts;

  return async ({ ip, path }: Request, res: Response, next: NextFunction) => {
    const limitKey = `${keyNamespace}:${ip}:${path}`;
    // retrieving the limit data from a specific hash
    const { tokensCount, lastRefill } = await redisClient.hgetall(limitKey);

    // how many tokens there are in a bucket currently
    const tokensInBucket = isNaN(+tokensCount) ? bucketCapacity : +tokensCount;
    // how many seconds passed since the last bucket refill
    const lastRefillTime = +lastRefill || 0;

    // calculating the Unix Timestamp (amount of secs since Epoch)
    const currentTimestampSecs = Math.floor(Date.now() / 1000);
    // time in seconds from the last refill; 0 means no refill was yet issued
    const secsSinceRefill = Math.max(0, currentTimestampSecs - lastRefillTime);

    // most recent refill * tokens/min
    const tokensToReplenish = Math.floor(secsSinceRefill * refillRatePerSec);
    // replenishing tokens up to a certain threshold; Ex: Max(500, 450 + 100)
    const replenishedTokenAmount = Math.min(
      bucketCapacity,
      tokensInBucket + tokensToReplenish,
    );

    if (replenishedTokenAmount === 0) {
      const retryAfter = Math.ceil(tokenCost / refillRatePerMinute);
      // how many refills (seconds) are required to make another request
      res.setHeader(limitResHeader, retryAfter);

      return res.status(TOO_MANY_REQUESTS).send({
        message: `Too many requests! Please try again in ${retryAfter} seconds.`,
      };
    }

    // how many requests may be made in total before the bucket becomes empty
    res.setHeader('X-RateLimit-Limit', Math.floor(bucketCapacity / tokenCost));
    // how many future requests may be made before the bucket becomes empty
    res.setHeader('X-RateLimit-Remaining', replenishedTokenAmount);

    // Updating the current points count (replenished) and last refill time
    await redisClient.hset(limitKey, {
      tokensCount: replenishedTokenAmount - tokenCost,
      lastRefill: currentTimestampSecs,
    });

    if (idleTimeout) {
      await redisClient.expire(limitKey, idleTimeout);
    }
    next();
  };
}
— — — — — — — — — — —
/* application.ts */

import Express from 'express';
import { rateLimit } from './rate-limit';

const app = Express();

const strictLimiter = rateLimiter({
  namespace: 'api:v1',
  // 4 tokens are added to the request quota every second
  refillRatePerSec: 4,
  // The maximum burst volume --> 500 requests.
  // The bucket gets fully replenished after 125 seconds (~2 minutes)
  bucketCapacity: 500,
});

/* soft custom policy, bursts allow up to 1k requests */
app.get('/v1/soft', rateLimiter({ bucketCapacity: 1_000 }), () => {
  res.end('This endpoint has not adopted soft rate limiting.');
});

/* strict default policy, allows up to 500 simultaneous requests  */
app.get('/v1/strict', strictLimiter, () => {
  res.end('This endpoint has adopted strict limiting policy.');
});

app.listen(8080, '127.0.0.1');
2. Anomaly Detection Instrumentary
More often than you think, the oncoming DDoS attacks may be detected and prevented well before they can cause harm to the targeted software system. This is so because the majority of them follow relatively similar, predictable patterns that may be monitored and swiftly responded to by the maintenance team.
To effectively track such threats, a software system usually relies on a specialized instrumentary, capable of providing necessary feedback in case something out of the ordinary (anomaly) is detected.
Of course, a software system could implement its own monitoring infrastructure, including common procedures like activity logging, behavior reporting, request tracing and continuous monitoring. However, building such functionality would require considerable effort combined with an extensive testing process, which would ensure resiliency to any ensuing bad actors.
Therefore, we recommend exploring the existing Software as a Service (SaaS) solutions, often referred to as Application Performance Monitoring (APM) tools.
Among other features (like distributed tracing), they allow connected applications to automatically monitor and report suspicious activities (such as recurring brute-force attacks) with dedicated telemetry software.
To conclude, by leveraging external APM products you can enhance the security of your software system and mitigate potential threats more effectively.
— — — — — — — — — — —
For instance, to attach a Sentry APM to the existing Node.js application, we need to install two associated packages:
@sentry/nodefor configuring the main Sentry SDK.@sentry/integrationsfor attaching complementary plugins.
/* sentry-apm.ts */

import * as Sentry from '@sentry/node';
import { RewriteFrames, Dedupe, ExtraErrorData } from '@sentry/integrations';
import { join } from 'node:path';

const sentryIntegrations = [
  // allows to transform stack trace records
  new RewriteFrames({
    // this path will be stripped from all event records
    root: join(__dirname, 'src/'),
    prefix: `api/${process.env.API_VERSION || 'v1'}/`,
  }),
  // removes duplicate events
  new Dedupe(),
  // extracts custom error attributes up to the second nesting level
  new ExtraErrorData({ depth: 2 }),
];

const appEnv = process.env.NODE_ENV || 'development';

Sentry.init({
  // your Sentry API key
  dsn: '<your-sentry-dashboard-url>',
  // "1.0" means that every error (100%) will issue an event
  // the actual sampling ratio should be carefully considered in production
  sampleRate: 1.0,
  debug: appEnv === 'development',
  environment: appEnv,
  integrations: sentryIntegrations,
});

async function handleGracefulShutdown(): Promise<void> {
  // wait for 5 seconds for pending events to be flushed
  await Sentry.close(5000);
  // terminate the process right after
  process.exit(0);
}

process.on('SIGINT', handleGracefulShutdown);
process.on('SIGTERM', handleGracefulShutdown);
— — — — — — — — — — —
With this setup done, you can now leverage a captureException(...) method for instructing Sentry to send any caught error to your monitoring dashboard:
/* application.ts */

import Express from 'express';
import * as Sentry from '@sentry/node';
// Don't forget to import the script above,
// otherwise the Sentry APM won't be initialized
import './sentry-apm';

const app = Express();

app.get('/api/v1/apm-test', (req, res) => {
  try {
    // Code that may fail with an exception
    // ...
  } catch (error) {
    const errScope = new Sentry.Scope();
    errScope.setTag('apiVersion', 'v1');
    errScope.setLevel('error');

    Sentry.captureException(error, errScope);
  } finally {
    res.sendStatus(204);
  }
});

...

async function bootstrap() {
  // Issues an event anytime Node.js MT is blocked for 10 seconds.
  // Keep in mind that this forks an additional RAM-consuming process
  await Sentry.enableAnrDetection({
    captureStackTrace: true,
    anrThreshold: 10_000,
  });

  app.listen(8080, '127.0.0.1');
}

bootstrap();
3. Meeting ReDoS Attacks
As with most software ecosystems, APIs built with Node.js often leverage regular expressions of diverse complexity to validate and parse the incoming data.
While this approach is indeed efficient, it introduces a potential security risk. Excessive reliance on regexes can make an application susceptible to one specific type of DoS, known as Regular Expression DoS (abbr. ReDoS).
The ReDoS is designed to pinpoint and exploit computationally intensive regular expression patterns which can skyrocket the server's CPU consumption.
This method is more sophisticated than the typical DoS attack, as it achieves the desired destructive effect without requiring a huge number of active connections.
This attack usually occurs when unsanitized user input is directly matched against some lengthy regular expression pattern (e.g. when verifying a valid email address). And, given that many developers passionately dislike working with regexes, this vulnerability often escapes their attention, therefore leaving a security gap in the targeted application.
To support the statements above, consider the following code that uses a regex to validate and extract URLs from a text input:
function extractUrls(text: string): Array<string> {
  const regex = /^(http|ws)s?:\/\/(www\.)?[a-zA-Z0-9]+\.([a-z]+)+$/;
  return text.match(regex) ?? [];
}

const baseUrl = 'wss://www.example.';
const anyNonCharacter = '~';
const backTrackingPattern = `${'a'.repeat(1_000)}`;

const maliciousInput = `${baseUrl}${backTrackingPattern}${anyNonCharacter}`;
const result = extractUrls(maliciousInput);

console.log(result);
— — — — — — — — — — —
The problem lies in ([a-z]+)+$ pattern, matching a Top Level Domain (TLD) of a URL.
Here, we have a character class
[a-z]+matching one or more lowercase letters.The outer parentheses (a capturing group)
(...)+indicate that the pattern within should be matched one or more times.Finally, the
$(end-of-line anchor) indicates that a whole sequence should occur at the end of the input string.
The real issue arises because the inner quantifier is not actually necessary. The outer + already allows for repeated sequences of lowercase letters.
However, the regex engine still needs to try every possible way to match the repeated pattern [a-z]+ at each position in the input string, going through all characters one by one.
This means that, for every additional repetition of the outer group, there's an exponential increase in the number of possible paths the regex engine needs to explore.
NB: Such behavior is often referred to as Exponential (Catastrophic) Backtracking.
If the input string has a long sequence of lowercase letters in the TLD and a non-character symbol at the end (forcing an engine to never match), the regex engine can waste an impractical amount of time exploring different character permutations, resulting in a Denial of Service situation.
Post Scriptum
I've sincerely tried my best to describe the example case as clearly as possible.
However, if my explanations seem a bit convoluted, or you're relatively new to the regular expressions, I'd highly encourage you to skim through a great article on this topic: JavaScript Regexes: The Catastrophic Backtracking.
— — — — — — — — — — —
To be secured against ReDoS, you may follow these best practices:
Use Anchors Selectively.
When you define matching patterns within the regular expressions, bind them to the start or the end only when it completely makes sense.
For that, you can use the start-of-line (^, abbr. SOL) anchor to specify that any string should start with the regex pattern or end-of-line ($, abbr. EOL) anchor to specify that the same string should end with it.------
In our example, the usage of EOL anchor forces to verify that any input string ends with a backtracking sequence, hence creating a ReDoS opening.
While this particular situation requires anchoring (as TLD must be always present at the end of the URL), in many cases it may be omitted.Limit Pattern Repetitions.
Be cautious about using regex quantifiers (repeaters) like*,+, and{min,}.
If you do require them, always assess whether you can limit the number of repetitions, and if so, specify the least possible amount.
You can utilize the{min, max}notation to declare a[min; max]range for repetition, which can help prevent excessive backtracking.Validate Incoming Input.
As a rule of thumb, always validate and sanitize a user input before processing it. In the case of regular expression candidates, this includes verifying the length and format of input strings to ensure that they meet the expected criteria.Be Certain in Your Regexes.
Consider using battle-tested libraries that are specifically designed to mitigate ReDoS attacks, such as thesafe-regexpackage. This module justifies the safety of provided regexes, therefore helping prevent common ReDoS vulnerabilities:
import ensureSafeRegex from 'safe-regex';

const regex = /^(http|ws)s?:\/\/(www\.)?[a-zA-Z0-9]+\.([a-z]+)+$/;
const safeRegex = /(https?|wss?):\/{2}(?:www\.)?\w{3,14}\.[a-z]{2,6}$/;

if (ensureSafeRegex(regex) && ensureSafeRegex(safeRegex)) {
  // Safe regexes, you can use them
} else {
  // Unsafe regexes, don't try to use them
}
4. Timing Out Slow Connections
So far in this section, we focused on the attack patterns aimed at overloading the targeted application as quickly as possible. However, there exists another powerful family of DDoS, known as "Low and Slow" (and its most notable inclusion, "Slowloris”), that uses a different approach. These attacks are characterized by their patience, as they take a considerable amount of time to achieve the desired effect.
The service targeted by Slowloris will be increasingly flooded with long-lasting connections that accumulate over time, hindering its ability to process requests from legitimate users. Each connection will periodically update the established network channel with small messages (typically sending new headers), keeping itself alive within a server memory.
If this attack goes unnoticed for a while, more and more sockets will connect to the server, diminishing its ability to accept new ones. If it isn't detected for a long time, the number of connected open sockets will increase with every passing second, amplifying the overall harmful impact.
To counter SlowLoris, it's essential to close TCP connections that infrequently write small chunks of data over extended periods. Such behavior may reflect an attempt to keep connections open for as long as possible, degrading the server's ability to accept new ones.
To address this issue, you should correctly configure timeouts for both the application’s upstream (request processors) and downstream (request issuers). Although these responsibilities are typically delegated to a complementary Sidecar Service, in case this option isn't available, they can also be configured at the application level.
— — — — — — — — — — —
Configuring Timeouts in Node.js
More precisely, we will touch the Idle, Request, Headers and Keep-Alive timeouts.
The
server.timeoutproperty controls the timeout for Idle (inactive) connections on a server. If no data is sent or received on a connection (considering both ways) for the specified duration, it is considered idle and is immediately closed.The
server.requestTimeoutproperty controls the amount of time during which the client has to send a complete request to the server. If the request is still pending after a specified duration, the connection is considered timed out and the client socket hangs up.The
server.headersTimeoutproperty controls the amount of time during which the client has to send a complete list of request headers to the server. If all headers have not been received within a specified timeframe, the connection is considered timed out and the client socket hangs up. As headers represent a single part of request parsing, their value must be lower than that ofrequestTimeoutThe
server.keepAliveTimeoutproperty controls the maximum amount of time between two consecutive requests on a persisted TCP connection. After the specified duration expires, a socket will be destroyed. This property only takes effect if theserver.keepAliveis enabled.The
request.setTimeout(duration)— A route-specific override of the server’s globaltimeoutproperty value.
— — — — — — — — — — —
Let us progress to the coding part:
import type { Socket } from 'node:net';
import {
  createServer,
  type ServerOptions,
  type IncomingMessage,
  type ServerResponse,
} from 'node:http';

const httpServerOptions: ServerOptions = {
  // Whether an underlying HTTP Agent would reuse persisted TCP-connections
  keepAlive: true,
  // For how long an HTTP Agent should persist an idle TCP-connection
  keepAliveTimeout: 5000,
  requestTimeout: 200_000,
  headersTimeout: 30_000,
};

const server = createServer(httpServerOptions, onIncomingRequest);

// global connection timeout for all underlying sockets
server.setTimeout(5000, (socket: Socket) => {
  const { address, port } = socket.address();
  console.log(`Socket ${address}:${port} has timed out.`);

  // manually destroying the socket, as it won't be cleared automatically
  socket.destroy();
});

server.listen(8080, '127.0.0.1', () => {
  const { port } = server.address();
  console.log(`Listening on port ${port}.`);
});

function onIncomingRequest(req: IncomingMessage, res: ServerResponse) {
  console.log('Request Received.');

  if (req.url.startsWith('/timeout')) {
    // overriding the global request timeout for a particular route
    req.setTimeout(2000);
  }

  // flushing the response socket after 3 seconds have passed
  const timeout = setTimeout(() => {
    res.end('Hello World!');
  },  3000);

  // clearing the timeout after sending the response to prevent memory leak
  res.on('finish', () => {
    clearTimeout(timeout);
  });
}
If the manual timeout configuration server seems daunting, you can time out the incoming requests by using the connect-timeout package.
— — — — — — — — — — —
Configuring Timeouts on a Reverse Proxy
You can just as well configure the required timeout values on a deployed Reverse Proxy instance, which serves as an intermediary between the public-facing Internet and your internal server infrastructure.
For example, in NGINX, the client_body_timeout directive controls how long a web server will wait between two consecutive writes of the request body. On the other hand, the client_header_timeout directive denotes how long NGINX will wait between two sequential writes of client headers. The default for both directives is 60 seconds.
# /etc/nginx/nginx.conf

user nginx;
# "auto" means that Nginx will automatically choose the suitable core amount
worker_processes auto;

pid /run/nginx.pid;
# maximum number of simultaneously opened file descriptors
worker_rlimit_nofile 100000;

events {
  # maximum number of open connections by a single worker process
  worker_connections 1048576;
  multi_accept on;
}

http {
  upstream node-backend {
    # supposing you have launched three Node.js APIs on ports 8080..8082
    server 127.0.0.1:8080;
    server localhost:8081;
    server localhost:8082;
  }

  server {
    listen 80 default_server;
    listen [::]:80 ipv6only=on;
    server_name _;

    # --- RELEVANT SECTION ---

    keepalive_timeout 30;
    # timeout the request if its body hasn't been fully sent within 15s.
    client_body_timeout 15;
    # timeout the request if a header list hasn't been fully sent within 35s.
    client_header_timeout 35;

    # --- RELEVANT SECTION ---

    location / {
      proxy_http_version 1.1;
      # must be enabled for HTTP/1.1 to take effect
      proxy_set_header Connection "keep-alive";

      # Passing any incoming request to the back-end server fleet
      proxy_pass http://dotnet-backend;

      proxy_set_header Host $http_host;
      # IP-address of an issuer (client)
      proxy_set_header X-Real-IP $remote_addr;

      # builds a chain of intermediate proxies requests
      proxy_set_header X-Forwarded-For $proxy_add_x_forwarded_for;
      proxy_set_header X-Forwarded-Proto $scheme;
    }
  }
}
5. IP-based Access Control (Traffic Filtering)
One of the most efficient methods of mitigating malicious attackers is to deny their access to a system altogether, as that prevents them from ever breaching the system's defenses.
IP Address Blacklisting.
This can be achieved through the implementation of an IP-Blacklisting mechanism, which will block well-known or potentially harmful actors from interacting with our application.
Node.js encapsulates this mechanism within a BlockList class from a net module:
/* ip-blacklist.ts */

import { BlockList } from 'node:net';

export const blockList = new BlockList();
blockList.addAddress('123.123.123.123');
blockList.addRange('10.0.0.1', '10.0.0.10');
blockList.addSubnet('8592:757c:efae:4e45::', 64, 'ipv6');
— — — — — — — — — — —
Now, we can create an Express.js middleware that will check whether an incoming socket passes the defined address blacklist:
/* application-express.ts */

import Express from 'express';
import { blockList } from './ip-blacklist';

const app = Express();

app.use(({ ip }, res, next) => {
  console.log(`Incoming socket's IP-address: ${ip}.`);

    // // Returns `true` if the address matches any provided rule
    if (blockList.check(ip)) {
      return res.status(403).send(
        'Access denied. Please contact us at <...> is this is a mistake.',
      );
    }
    next();
});

app.get('/', (_, res) => {
  res.end('Sample response.');
});

app.listen(8080, '127.0.0.1');
— — — — — — — — — — —
Of course, the same can also be done in a vanilla HTTP Server:
/* application-vanilla.ts */

import { createServer } from 'node:http';
import { blockList } from './ip-blacklist';

function onIncomingRequest({ socket }: Request, res: Response) {
  const { address, port } = socket.address();
  console.log(`Incoming socket address: ${address}:${port}.`);

  if (blockList.check(address)) {
    res.statusCode = 403;
    return res.end('Access denied. Please contact us at <...> is this is a mistake.');
  }

  res.end('Sample response.');
}

const server = createServer(onIncomingRequest);
server.listen(8081, '127.0.0.1');
IP Address Whitelisting.
To achieve an even more robust defense, consider an alternative pathway: the access rights will only be granted to a select (few) set of trusted services. By incorporating this method, your system can be fortified against all unauthorized access attempts, ensuring that only the most credible sources are granted access.
To implement this, look no further than the express-ipfilter package:
import Express from 'express';
import { IpFilter as ipFilter } from 'express-ipfilter';

const ipWhitelist = ipFilter(
  // Allow only the following IPs
  ['127.0.0.1', /* ... */],
  {
    mode: 'allow',
    log: true,
  },
);

app.use(ipWhitelist);

app.get('/', (_, res) => {
  res.end('Sample response.');
});

app.listen(8080, '127.0.0.1');
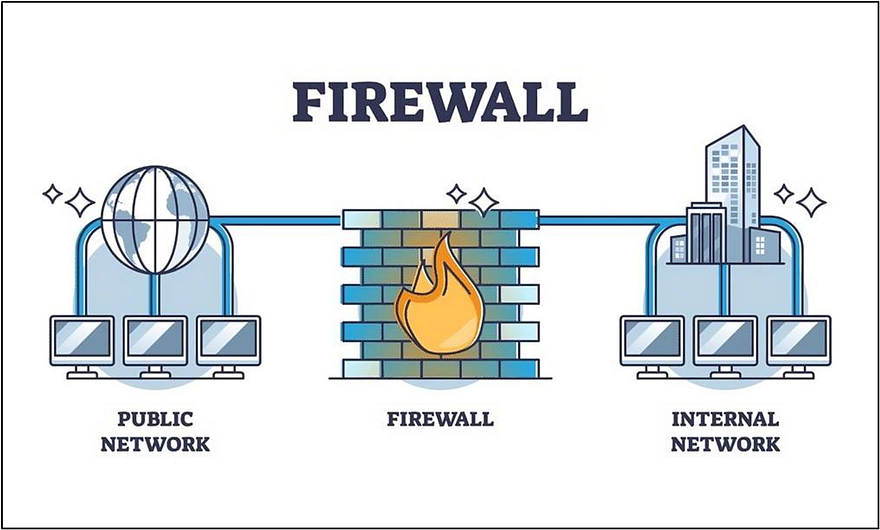
6. Web Application Firewalls (WAF)
While the strategies discussed earlier are crucial for the mitigation of DoS/DDoS attacks, they primarily focus on securing the Application Layer. However, as a web service exposes itself to the public internet, it becomes vulnerable to yet another powerful adversary - the Network Layer.
Attacks targeting the lower, network layer can often bypass the existing security measures if not addressed specifically. Therefore, to ensure a robust all-round resiliency, it's vital to implement a strong defense mechanism at the network perimeter.
In this section, we will focus on the importance of Web Application Firewalls as a fundamental layer of defense against such attacks.
Web Application Firewall (WAF) is a specialized software designed to protect applications from a wide range of prevalent attacks, primarily focusing on the prevention of DoS and DDoS. It acts as a barrier between the attached service and the incoming traffic, identifying and filtering malicious request patterns, thus preventing them from ever reaching the underlying servers.
In particular, by employing a WAF as a complementary defense layer, an application can greatly enhance its resilience against:
Malicious Traffic: by leveraging robust mechanisms for address-based and/or content-based request filtering;
Suspicious Behavior: by detecting anomalies in network traffic, such as a sudden increase in overall volume;
Prevalent Attack Types: by maintaining a comprehensive database of known signature attack patterns, such as XSS or SQL injections;
Botnet Malware: by identifying potential botnet malware, preventing a system from being infected and exploited by bad actors.
Many CDNs or hosting providers offer integrated WAFs out of the box. If for some reason they don’t, you can adopt a self-hosted solution. The most popular include:
AWS WAF & Shield: AWS offers a powerful WAF and DDoS combination in the form of AWS WAF & Shield that seamlessly integrates with AWS infrastructure.
CloudFlare: CloudFlare is a well-known CDN that provides a robust WAF ecosystem as part of its services.
Imperva: Imperva provides a range of security solutions, including WAF services, designed to protect applications and data.
ModSecurity: it is a free open-source WAF that can be integrated with various web servers and applications, like Nginx and Apache Server.
Nginx NAXSI: it is a free open-source WAF module for the Nginx reverse proxy that seamlessly integrates with the existing configuration.
Ubuntu Firewall (UFW): UFW is a host-based firewall for Ubuntu and other Linux distributions. While it's not a dedicated WAF, it may still be used to secure a server against unauthorized access.
Each of these WAF solutions has its unique strengths and may be suitable for different use cases. When selecting a WAF, ensure it aligns with your application's infrastructure, existing security measures and non-functional requirements.
7. Intrusion Detection Systems (IDS)
The Intrusion Detection System (IDS) is another security mechanism designed to protect the Network infrastructure of our applications. They excel at monitoring various network activities for malicious actions or security policy violations, including DDoS attack patterns. This especially applies to the DDoS attacks, which are one of IDSs` primary concerns.
The conceptual goal of an IDS system is to promptly detect and report any unauthorized access, functionality exploits or traffic anomalies - essentially thwarting any network "intrudings," as the name implies.
There are two main types of IDS:
Network-based IDS (NIDS): monitors all in- and outbound network traffic within a multi-service network.
Host-based IDS (HIDS): watches for system activities (like OS file access) on a certain device it is deployed on.
— — — — — — — — — — —
Combining IDS with Intrusion Prevention Systems (IPS)
The Intrusion Prevention System (IPS) can be considered an extension of IDS, imbued with an ability to take action against the detected threats in real-time.
So, while the standard IDS only passively monitors and raises alerts, the IPS quickly takes proactive measures, including rejections of malicious traffic, modifications of firewall rules, or even reconfiguration of application-wide network settings to stop an ongoing attack.
The IDS and IPS systems can be seen as part of a continuum.
IDS identifies threats, while IPS takes proactive measures to block or contain them.
In most cases, you won't end up using these two mechanisms separately. Instead, their functionality is merged into a single service, referred to as the "Intrusion Detection and Prevention Systems" (abbr. IDPS).
In tandem, the IDPS creates a robust network security infrastructure, elevating security to new heights. The IDS component provides visibility into potential threats, while the IPS component allows for immediate response to mitigate risks and prevent security incidents.
— — — — — — — — — — —
Difference from Firewalls
Action Scope: The Web Application firewalls primarily focus on securing the Application layer or high-level Network components, protecting against attacks like SQL injection and XSS. The ID(P)S systems, however, provides a more low-level security mechanism, primarily pivoted to the Network layer.
Nature of Threats: ID(P)S systems address a wider range of threats, including network-based attacks, while WAFs are more specialized in Application layer attacks.
— — — — — — — — — — —
When combatting DDoS, the IDS can identify patterns indicative of a Denial of Service attack, such as a sudden spike in traffic from multiple sources.
On the other hand, IPS, with its ability to actively block traffic, can help mitigate the impact of a DDoS attack by filtering out malicious traffic and allowing only legitimate user traffic to reach the targeted network infrastructure.
Conclusion
In this part of our series, we've taken a deep dive into the world of Denial of Service threats, which has provided us with a solid understanding of this attack pattern, as well as essential knowledge of mitigation mechanisms that constrain such threats.
Please keep in mind that countermeasures described here are imperfect on their own, and require their application-specific combination to serve as a reliable layer of defense. We have only touched on the possible preventive measures from the pure programmatic standpoint, therefore excluding high-level Software Design principles (like Scaling In/Up, SPOF, CDN or Fault Tolerance).
So, with this, you are now well-equipped to secure any server-side applications and get ready to continue exploring the intricacies of DoS & DDoS on your own.
Stay vigilant, validate inputs rigorously, and embrace a holistic approach to server-side security.
Additional Resources
For further exploration of the DoS vulnerabilities and security best practices, you can refer to these external resources:
In the next article…
Very soon, we will continue to enhance our comprehension of the prevalent attack patterns within the domain of web security. In particular, we shall delve into fundamental principles of another injection-based threat - SQL Injection (SQLi), centered around the Achilles' heel of every application service - the database.
If that sounds interesting, stay tuned for further updates!
Until then, stay secure and happy coding!


